
Ronen Bekerman is an industry leader in Architectural Visualization who hosts in-depth tutorials on his specialist blog. Architizer is pleased to present a selection of these guides written by some of the world’s best rendering artists.
Keeping on the trail we took in the previous installment of this series, “A Photographic Approach to Architectural Visualization“, we will check how these effects can be transported into the world of real-time, more specifically with Unreal Engine as the champion of game engines making their way into the realm of ArchViz. To present this case, let’s take a trip down memory lane starting at the point that sparked it all for me and for the ArchViz community at large as well.
Here, Lasse Rode of Berlin-based studio xoio takes Unreal Engine for a good spin as he strives for photorealism using a real-time tool. He does this with his great-looking, and mostly white, Berlin Flat scene as seen on the forums. Follow along as Lasse explains getting started with Unreal Engine 4. Enjoy it!
Introduction
My name is Lasse Rode, and I am part of studio xoio. We are a small agency specializing in visualization and illustration works for architecture and product marketing. Usually we work in a kind of “traditional” 3D environment utilizing applications such as 3ds Max and the like. We are constantly checking out new rendering engines and currently making big use of Corona Renderer, V-Ray and Octane. Each engine has its strengths, and we always try to use it like that: each for the best purpose.
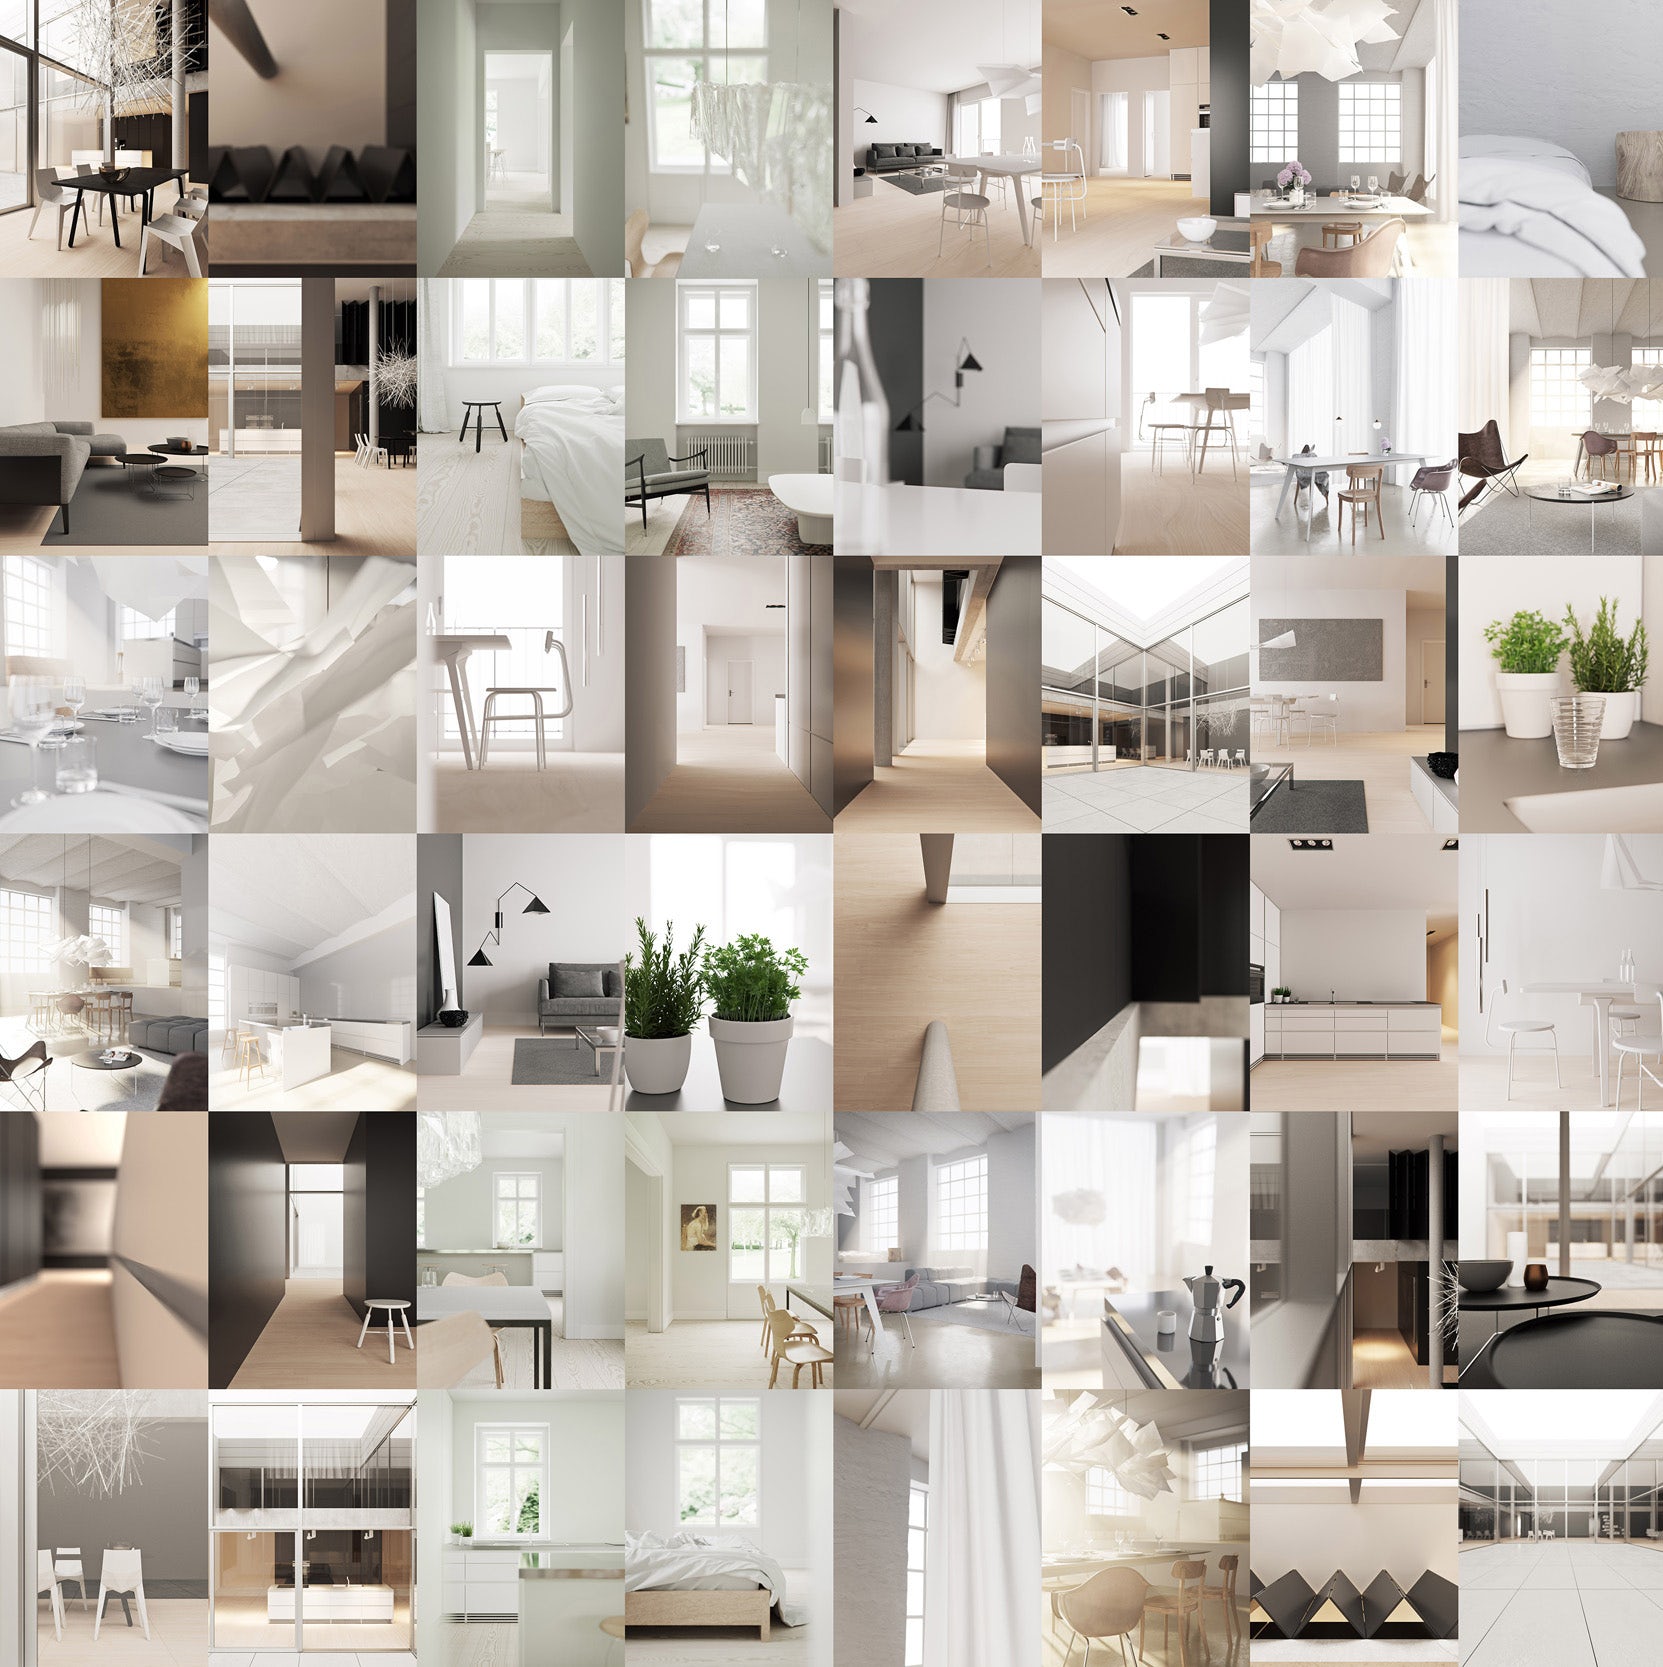
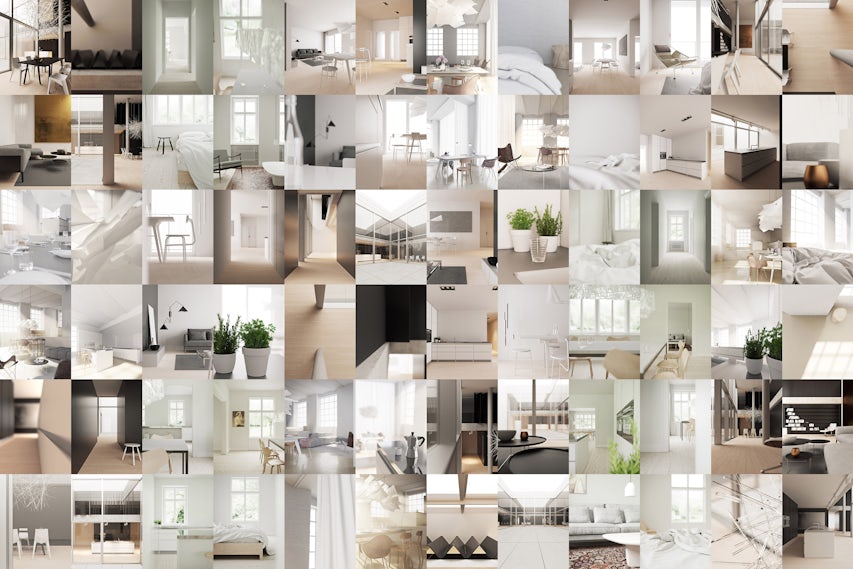
Lasse Rode’s modeling techniques enable realistic renderings to be created in a relatively short amount of time; images via Corona Renderer.
Back in August 2014, I stumbled upon some drop dead gorgeous Unreal Engine 4 architectural visualization tests by Frenchman Koola, which immediately reminded me “The Third & The Seventh” by Alex Roman, only this time it was done in REAL-time.
In my eyes there have been several main trends within our industry: The strive for (photo)realism and becoming faster — if not real time. Not having to wait for your rendering to come out of your render farm was always a dream for us — especially when rendering animations!
For a long time, the main downside of the “real-time-thing” was the lack of quality you could achieve compared with pre-rendered still images or animations. So even though it looked very interesting, the application of it in a visualization context seemed hard to imagine. And honestly, the “gamey” look of it made it hard to sell for high-demanding clients from the architecture and brand fields.
This has changed rapidly. The results possible with real-time engines today are very beautiful and convincing!
Why Unreal Engine?
The release of UE4 gained a lot of attention within our industry, and the possibilities seemed to be endless. The PBR (Physically Based Rendering) material system and the easy-to-use importing pipeline for getting your models into the Unreal Engine were the most compelling reasons for us to give it a try — in addition to the quality of output possible! If you have seen the work of Koola (also available as a download in the Unreal Engine Marketplace), which went viral some weeks ago, you are probably as convinced as we are that Unreal Engine 4 is capable of impressive quality.
In the following article, I want to give you an outline of the workflow I used to make the Berlin Flat scene you can download from the Marketplace and share some techniques and tricks I came across during the process. Some of them I found myself, while others are derived from information I found on the web. The Unreal Engine Forums and Documentation are a vast and great resource, as are the starter content that comes with the engine and the assets and scenes you can get from the Marketplace.
The Berlin Flat
I made a series of images of this flat in a historic building in Berlin at the beginning of 2013 using 3ds Max with the Corona Renderer. It’s a flexible way of handling the color-mapping, which really helped to pull off the very whitish mood of the whole set. This actually was also the reason for choosing it when giving UE4 a try.
I noticed UE4 being very successfully used on scenes with gloomy lighting and busy textures. I suspected it to be not that easy to get precise shadows and GI within an ultra-white interior.
And honestly: It is a tricky task!

Above is one of the original renders done with 3ds Max and Corona Renderer. To have a look at the entire set, click here. Below is the UE4 video made with this scene …
Viewing on mobile? Click here.
The Original Scene
The entire model was done in 3ds Max in a rush, so I actually detailed only the parts that are visible in the final images. Of course, this is an approach that is not possible in a real-time environment. Repurposing the scene for use with Unreal Engine, I had to reduce the scope a bit because furnishing and detailing the complete space would have taken too much time for testing purposes. I decided to export only two rooms: the ones you see on the lower part of the screenshot below.

© Lasse Rode
Exporting the Geometry for Unreal Engine
This is a very easy task IF you keep some things in mind!
It makes sense to split things up a bit. Because the lightmass is calculated with a separate map for every object, it is good to be a bit careful with high values especially on big plain objects like walls and ceiling. Because of this, I only exported the inner faces of the walls that we actually see.
I also added a bit to the top and bottom of the walls to intersect them later with the ceilings. I found this to be a good way to prevent “light leaks” — lighting artifacts that happen when geometry is not closed or not intersecting. This is no problem when having a gloomy scene with lots of busy textures, but because we are going to have an ultra-white space, it is important to get as precise GI as possible, especially in the corners.

© Lasse Rode
The second crucial thing is to create unwrapped UV coordinated for the channel the GI is going to be stored in by Unreal Engine’s lightmass calculation. In 3ds Max, this would be UV-channel 2.
Channel 1 is for use by all the other textures like diffuse, roughness, normal, etc. Unreal Engine counts the channels starting from 0, which can cause some confusion in the beginning — but once you get it, it is fairly simple.
Note: Unwrapping is only important for the light-map channel! For the texture channel, any kind of mapping can work, such as cubic or cylindrical mapping. In most cases, a simple “flatten mapping” in 3ds Max unwrap does the job to create sufficient UV-coordinates!

© Lasse Rode
If you want to put your scene together in UE4 like it has been in your Max-scene, it is good to leave the entire “space” in place when exporting because the object’s coordinates are easier to align. For single objects like chairs and other assets, it is very comfortable to export it only once and install them in your Unreal Engine scene. For this purpose, it is good to move them near the center of your 3ds Max scene because the new object’s pivot in Unreal Engine will be there.
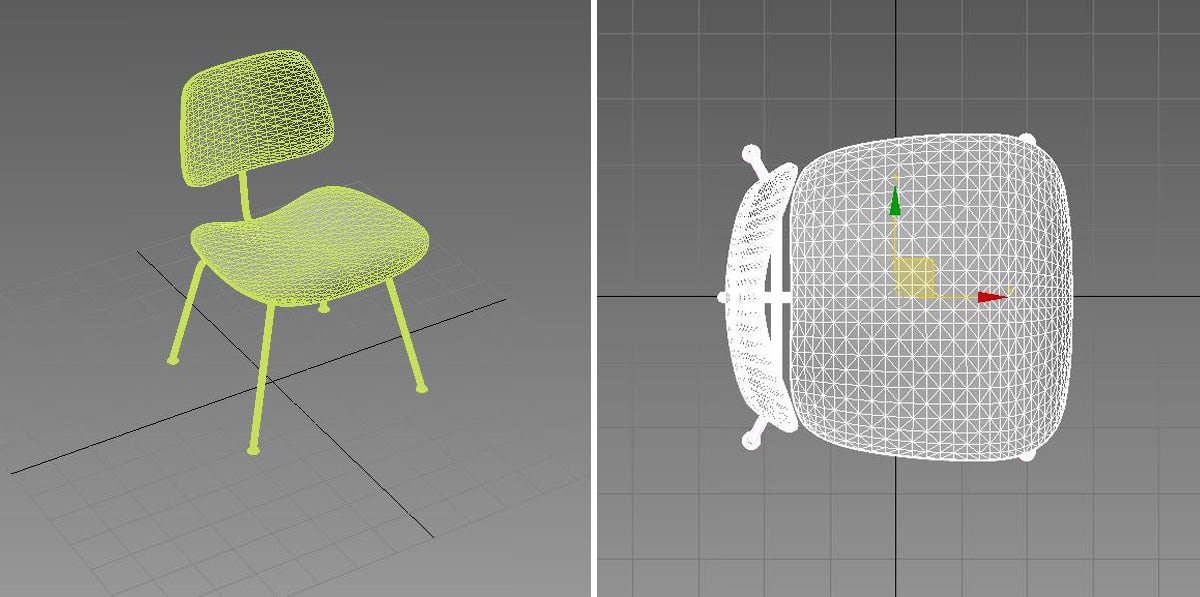
© Lasse Rode
I used high-poly geometry without any LOD (Level of Detail) simplification. This is only recommended in small scenes like this one, but because I’m after a smooth experience and don’t want to have any jagged edges on my furniture, this was logical for me. I have no doubt there’s room for optimization, though!
Make sure your assets are merged into one object and have different material-IDs applied to handle the different materials later in UE4. Then, save your geometry as an FBX file and off you go over to the Unreal Engine editor!
Importing Into Unreal Engine 4
Importing FBX files into Unreal Engine 4 works pretty smooth! I did it in several steps.
I prepared different files that made sense:
- The geometry of the room in a separate FBX file
- Different file for the assets, each with some objects in them
Just make sure to uncheck the “Combine Meshes” to receive your objects separately and not baked into a single mesh!

Materials
I’m a very straightforward guy and a big fan of simple setups! It’s a philosophical thing, but achieving things with the least effort possible is far superior to using a setup only you understand or you can’t remember when opening a scene half a year later.
So this example of a shader is very simple, consisting of a diffuse map, desaturated and blended with black color. The same map is then color corrected and inverted to put into the roughness channel of the material. Done.

A normal map would have been too much here, but feel free to explore the materials for yourself in the scene!

© Lasse Rode
Here you see the wood material applied to the chairs and the table — a dark dyed wood with a crisp matte reflection revealing the wood structure and texture.
In this image you see two more materials that might be of interest: firstly the curtain, which is backlit by sunlight and is a two-sided material:

You have to set the Shading Model to “Subsurface” and add a constant node with a value smaller than 1 and wire it to the Opacity property of your material to get this effect.
Secondly, the jar in the foreground has a very simple glass material:

© Lasse Rode
It has a fairly dark diffuse color, zero roughness and a high specular value. I also involved a Fresnel-node with a value of 1.5 to control the opacity and refraction. There are a lot more complex ways to generate more realistic glass — but I honestly had some trouble to really get control over that, so this easy glass seems to be good enough.
Note that I checked “Two Sided” and set Translucency Lighting Mode to “TLM Surface” in the Details tab on the left.

© Lasse Rode
One other material I want to show here as well is the floor because this one is the only one to have a normal map applied:

Here you see a material defined by a diffuse color, a roughness texture and a normal map. The diffuse color is a simple very light gray, defined by a 4-value constant.
Roughness looks a bit more complex: On the left, you see the same map three times scaled differently with a TexCoord node. The red channel of each is then multiplied with the others and then wired as an alpha into a Linear interpolation node (Lerp) to blend to values; 0.3 and 0.2 in this example to get a subtle noisy reflection on the floor planks. This is then fine tuned with a “Power” node to get just the right amount of roughness that looks OK.
The normal map again is influenced by a TexCoord and is then flattened a fair amount via a “FlattenNormal” node to get a subtle relief on the material.
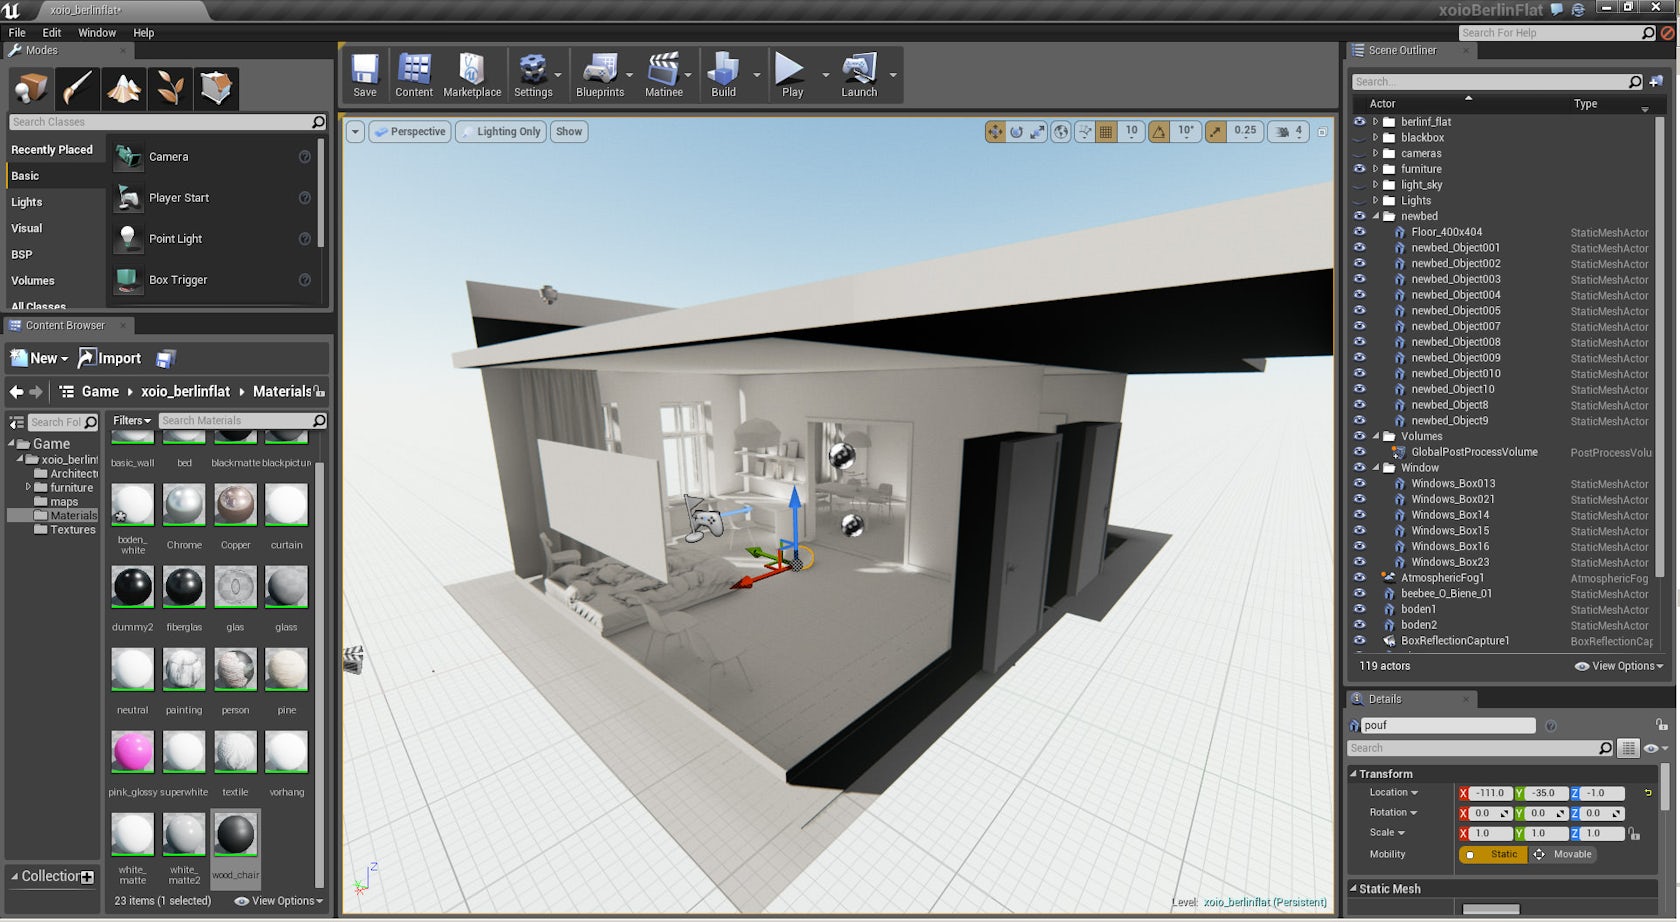
Preparing the Assets
Before dropping the assets into your scene, it is always best to apply the materials onto them within the geometry editor. You only have to do it once and can still apply different materials in the main scene if needed. This is a fast process: Here you see it is important to apply different Material-IDs to your objects to put the different materials where they belong!

Building the Scene
This is kind of brief, but: Put the thing together. First you have to drag in the room geometry. The best way is to select all the parts needed and drag and drop them into the empty scene. Afterwards all the furniture and assets have to be placed in the environment.
Here you don’t see the back faces of the outer walls. As I’ve explained above: They are only single-sided for better lightmass calculation.
For this exact purpose it is also good to set the lightmap resolution for your larger objects to a high value, for the walls I set it at 2048, for example.

© Lasse Rode
As mentioned above, light leaks can be an issue. To prevent these, I put black boxes around the whole scene. It looks kind of messy from the outside — though more clean on the inside!

Lighting and Lightmass
The lighting is also a fairly simple setup: I used the “Koola method” — a combination of a sun and planes with spotlights in front of the window to simulate a skylight. It is rather effective and easy to control!
To calculate the global illumination, only a few tweaks are important:

© Lasse Rode
I drastically increased the lighting bounces and the indirect lighting quality. I also decreased the smoothness to 0.6. Details are pronounced better and the shadows don’t wash away so much.
Further to this, I set the direct lighting to a dynamic shadow, which is important to have the light moving later in the animation!

© Lasse Rode
The last step before hitting “Build” is to set the Lighting Quality to “Production”!

This should result in smooth lighting everywhere.
Actually when getting to this point the first time, I was kind of thrilled! This is actually the strongest part of this engine: to thrill you. Being able to move inside my “rendering” in real time was really a delightful moment!
Post Processing
One of the greatest features is the possibility to apply color correction and camera effects just within the editor. This can be done with a Post Process Volume for global settings. I did some tweaks on the saturation, fringing and vignette, the bloom, disabled the auto exposure by setting the min. and max. values to 1 and increased the overall brightness by setting the Exposure Bias to 1.42. I also added a lens flare, which I find really awesome happening in real time!
Setting up the Animation
The ability to move freely inside the scene makes doing animation a very easy and pleasing task because of the instant-feedback nature of the real-time environment. As a frequent user of compositing software, it took not much time for me to adapt to the integrated Matinee tool and set up an animation.
First thing to do is setting up a Matinee Actor.
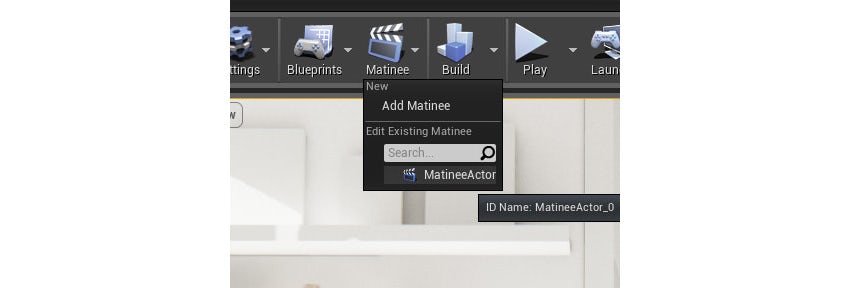
When opening Matinee, you will see a window with a track section and a curve editor.

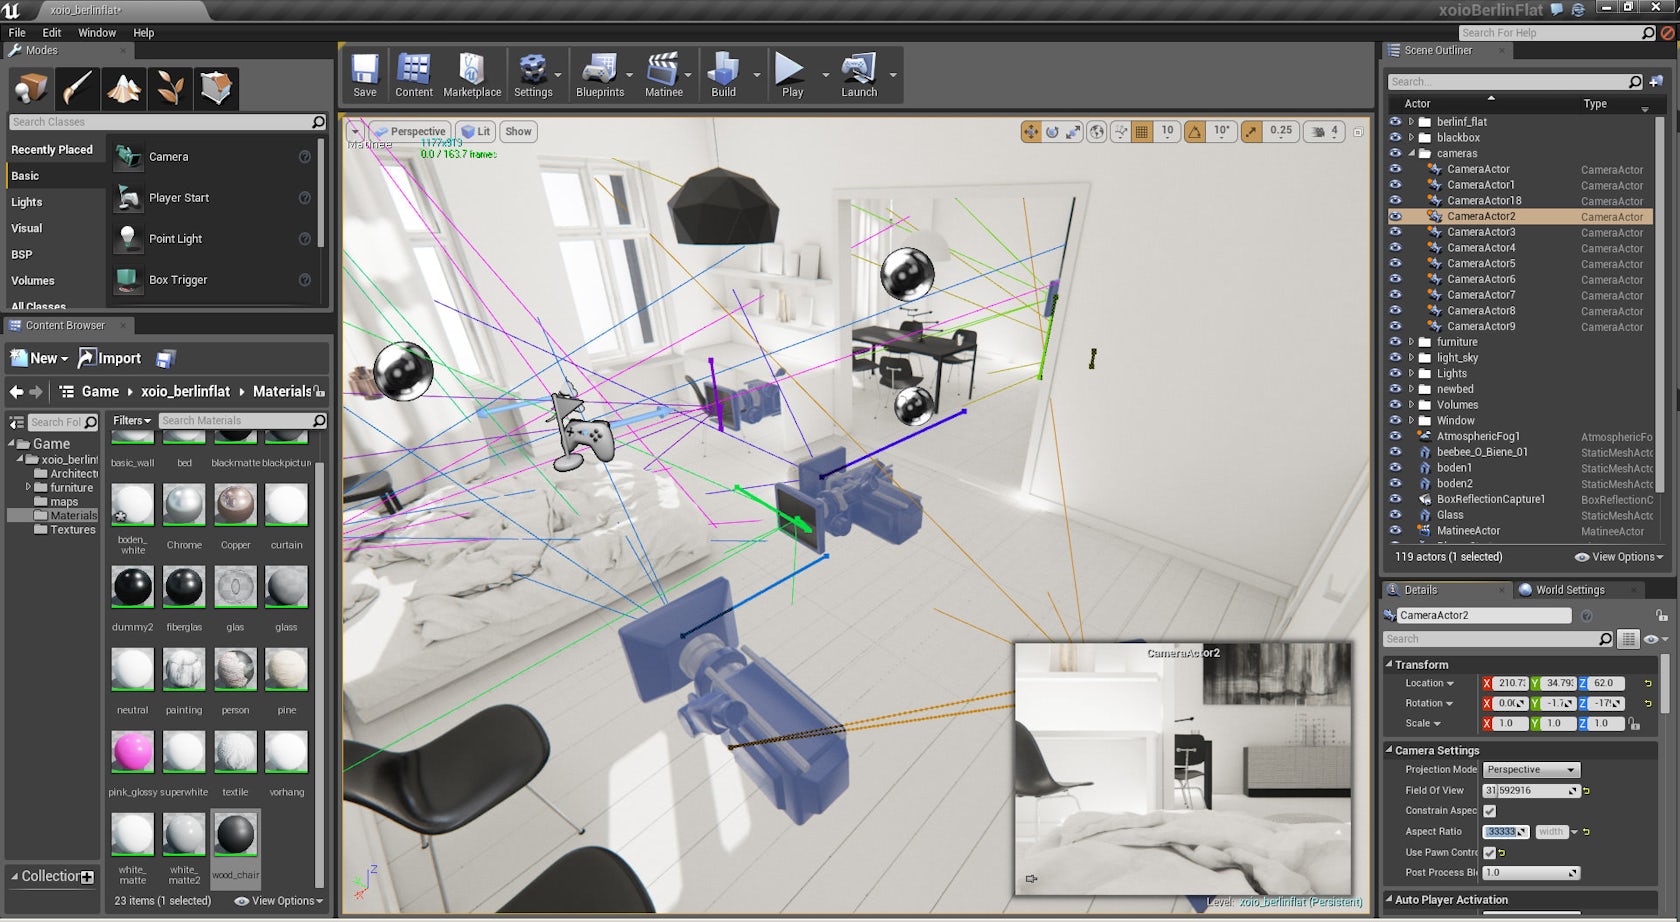
Setting up the cameras and animation work is very self-explanatory. Motion is controlled by key frames and curves just like any other animation software. Also the “cutting” work is done just within the Matinee editor.
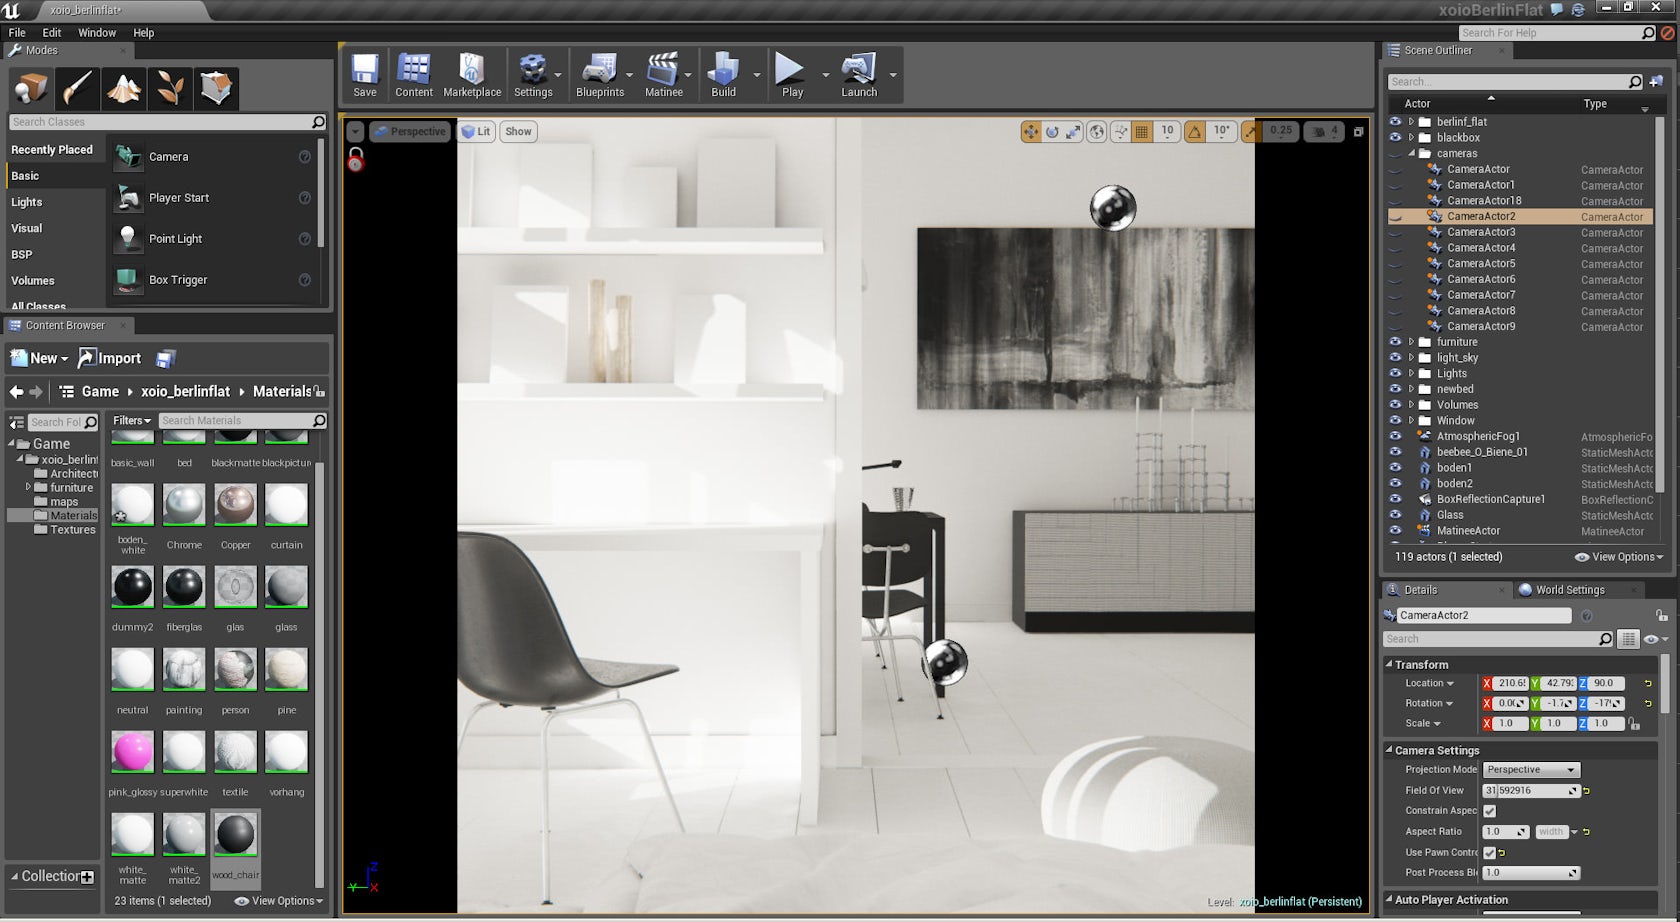
I created a couple cameras moving slowly through the space: Seeing exactly what you are doing really helps to tweak the timing of cuts and speed of camera movement!
You can see the camera trajectories just in the editor and control the editing on the fly! After getting the rough “cut” done in Matinee, I then exported the complete animation as an AVI and fine-tuned it in Premiere and aligned it to the music.
Conclusion
The entire process starting at exporting from 3ds Max and importing into Unreal Engine 4, working out the shading and lighting to produce the animation and then posting on YouTube took me about one day. This speed is unheard of in ArchViz and reflects very much the key potential that lies in the use of Unreal Engine 4 for visualization works.

Some screenshot details from the animation
The absence of render times in terms of “producing” images really makes the process of creation very flexible and free. The fast feedback of your action is the real revolution!
We are constantly thinking and testing the possibilities of applying this kind of production and workflow into our daily work and our environment as a whole.
There are a lot of possible applications, and we are very eager to explore them!
I hope I gave some insight into my motivation and process and wish a lot of fun with the Berlin flat scene.
Kind regards,
Lasse.
This article was first published on Ronen Bekerman Architectural Visualization Blog in December 2014 and refers to software available at that time. Enjoy this article? Check out the other features in our series on “The Art of Rendering”:
Methanoia Reveals the Story Behind Architecture’s Most Striking Visualizations
When Architectural Visualization Gets It Right: Victor Enrich’s Surreal Art
7 Magical Demonstrations of Hyper-Real Environments
Alex Hogrefe Creates Stunning Architectural Visualizations Using SketchUp and Photoshop
How Technology Will Revolutionize Architectural Representations